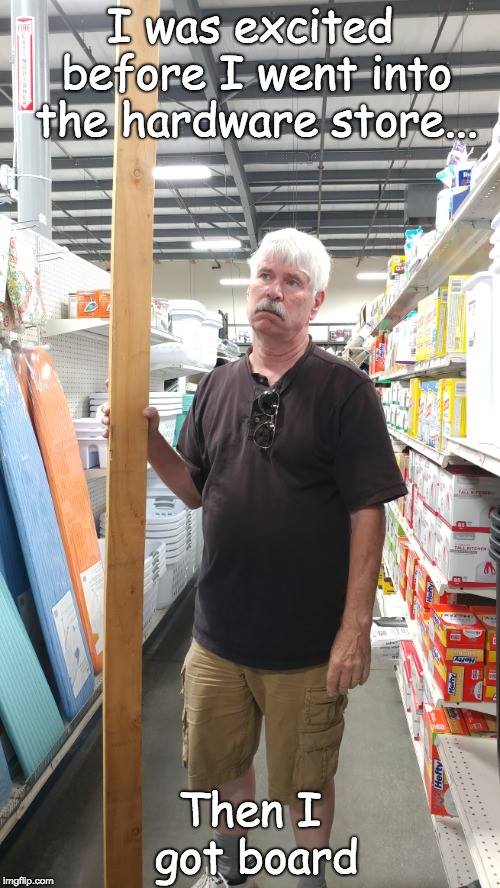
After decades of experience, I have decided, and confirmed a multitude of times, that there is never a tape measure around when you need one.


Hello, Gentle Reader(s?),
One of the things that every guitar owner must take into consideration when he or she makes an investment into a new instrument is – “Where am I going to keep this thing?”
This is not as easy a question to answer as one might think. Especially if you have a wife in the house. You can’t just make room for it on her side of the bed and expect her to be OK with it (wives can be funny that way). And you also can’t just pop it into the refrigerator and hope she doesn’t notice.
No, you have to be more imaginative than that.
Fortunately, you have me to show you how to be more imaginative than that…
After you have decided to display the instrument (assuming you are going to display it, that is – but what good is it to have such a fine piece of art unless you are going to make it visible to anybody who walks into the room – or even into the immediate neighborhood?), one of the first considerations to, well, consider, is the dignity with which the instrument is displayed.
Here are some things to think about NOT doing:
Now, The best way I can think of to demonstrate the proper method(s) of displaying your guitar or collection of guitars is to show you what I have done over the years.
First attempt:
The Guitar Love Seat

Second Attempt:
The Original Guitar Wall:

Third attempt:
The Guitar Wall – Fuller, Cooler and Groovier

Third attempt, part B:
The Guitar Wall and Floor

Third attempt, part C:
The Charred Guitar Wall

Third attempt, part C (cont’d):
The Empty Guitar Wall

Fourth attempt:
The Guitar Driveway

Fifth attempt:
The First Replacement Guitar Wall

Sixth attempt:
The Guitar Closet

Seventh attempt, fourteen months later (last week):
The Second Replacement Guitar Wall

Seventh attempt, part B:
The Guitar Wall and Floor

*On a sad note, Monty (pet snake) did not survive the fire, either. I had hoped for a long and happy life for him and used to joke that I would turn him into a guitar strap when he passed. However, I couldn’t bring myself to do that when we found him and we buried him under a tree (see “Guitar Driveway” above), next to the driveway. Rest well, Monty. I really do miss you…

Well, hello again friends and neighbors! Time for another journey into the mechanical world of me. This time, we’re going to explore the use of the following implements:
As many of you know, I learned the difference between a hammer and a ladder in our last episode (The Gazebo Project). Well, now I’m going to put that knowledge to good use by helping the long suffering Judy (my beloved wife in whom I am well pleased) frame some of her various college degrees and professional certificates, so that she can properly display them in her new office…
Many of you know that Judy started a new job in October as the founding librarian and assistant professor of information sciences at a brand new university in central California. She is very excited to be a part of that project, and the faculty, staff and and administration are excited to have her there.
One of the things that Judy has noticed around the campus is that the Administrators, Deans and Professors all have their office walls covered with their various degrees, certificates, etc., and she has decided that it would be proper to display her degrees, certificates, etc. on the walls of her office, too.
Fortunately, most of that stuff survived the fire, so she still has it to frame (or re-frame because most of the frames were lost to smoke and/or water damage, as the case may be). We went out yesterday and, after several months of going from place to place – at least it seemed like months yesterday – we found suitable frames into which she can place her diplomas, etc.. The one caveat is that the store didn’t quite have enough to cover the number of documents she has to hang, but she said that she would work around that.
And, at long last, this brings us to the point of this post: I got to use my mechanical talents once again…
And you get to be a part of that experience…
Prepare to be amazed…
No – really!
Let us begin…
While Judy and I settled on just the right frames for the project, they were lacking one item – Attached Hangers. Yes, the frames came equipped with wood, glass, backing and all of the things required to install the documents and put them on the wall with the exception that the hangers were were all in plastic zip lock bags, attached to the back panels of the frames.

disclaimer: Bag shown at 17 times actual size.
Normally, this would not be too much of an issue even for me, because all of the parts were, at least, present. However some of the parts were of unusually small size and that made assembly a bit more difficult for someone whose hands are populated with a quantity of ten big toes (specifically, me).
One of the smaller items in the bag was the required screws. I don’t want to sound like I’m making excuses, but those screws are really, really amazingly teeny-tiny-inky-dinky small, small. In order to give you some idea exactly how minute they are, I plucked a baby albino pigmy flea from one of Murphy’s eyelids, stuck it under a microscope alongside one of the screws and photographed them side by side. (I originally wanted to use its mother, but I couldn’t get all of her into the picture without panning out so far that the screw completely disappeared from view):

Well, as it turned out, I needed to drill some pilot holes into the back of the frames in order to begin to think about being able to drive the screws to attach the hangers to the frames that would hold the diplomas as they hung on the wall in Judy’s office. Again, normally, this wouldn’t be a problem…
Except that I don’t own a drill bit small enough to create a hole that would allow the screw to grab onto something solid (not air) and be held in place. However I am not without imagination, and I figured out a way to overcome this handicap. I just needed a really small nail and a hammer…
Fortunately (mostly), I have each of those requirements. I fetched them. I used them. And I successfully attached all of the needed hangers. And they are perfect.
Except for one…
I seems that I was a bit over zealous in driving the pilot holes in this one, and I inadvertently drove a bit too far:

Aparently, the holes are not supposed to go all the way through to the front of
the frame because it detracts from the intended focal point of the presentation.
Also fortunately, I am blessed with an extremely patient and forgiving wife.* And even more fortunately, those qualities lasted through today because she came up with a great idea for how we can still use the frame and give my ego a tremendous boost in the process:
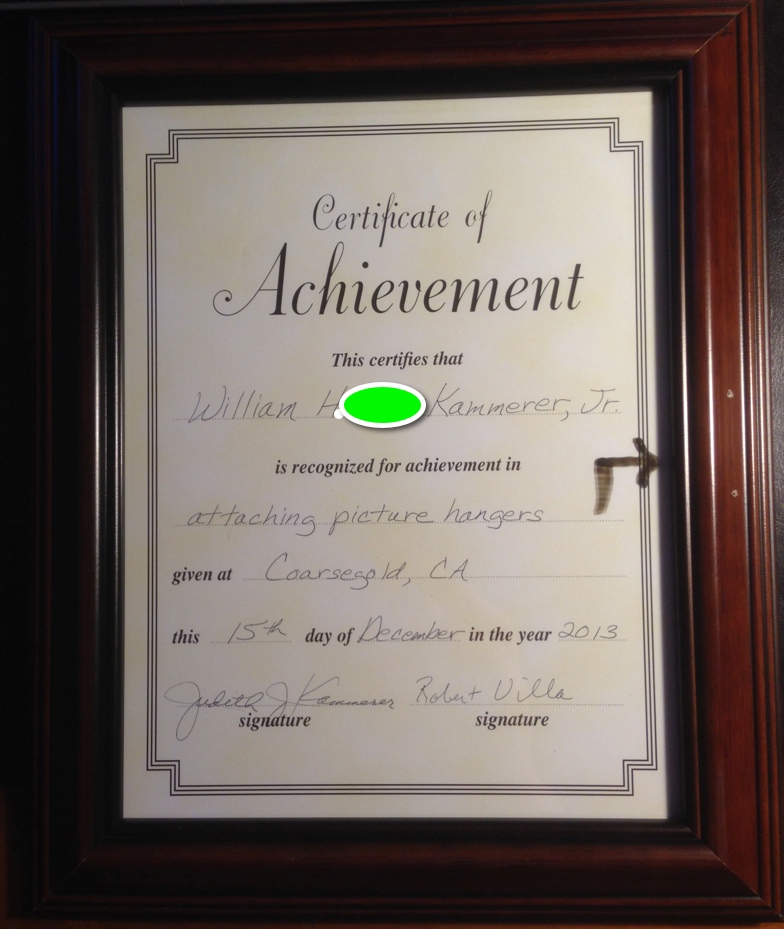
I thought that was really sweet of her, and I was really feeling pretty good about the whole situation (other than the fact that she is now down three frames instead of two) – that is until I hung my “Certificate of Achievement” on my office wall…


I am wondering if Judy caught this before I hung it on the wall…
* We have been married 42 years, and when people ask how we have managed to stay together so long, Judy says “It’s easy… I have a really bad memory…”
Well, tool lovers, it’s time for another foray into the world of “putting stuff together with Bill!” This time, also staring Judy as my faithful marital partner and “let’s assemble something today” sidekick, and Troy, as the completely amiable Sears sales representative.
You may remember my experience with the Black and Decker Workmate Portable Workbench and Project Table from last year. This one promised to be infinitely more exciting, largely because it came in a much bigger box and had lots more parts than the last project.
This, you would think, would have occurred to me at the time of purchase. It’s a gazebo for crying out loud, and if one pays close attention, there are reasonably ‘easy to detect’ differences..
Portable Workbench 
Gazebo
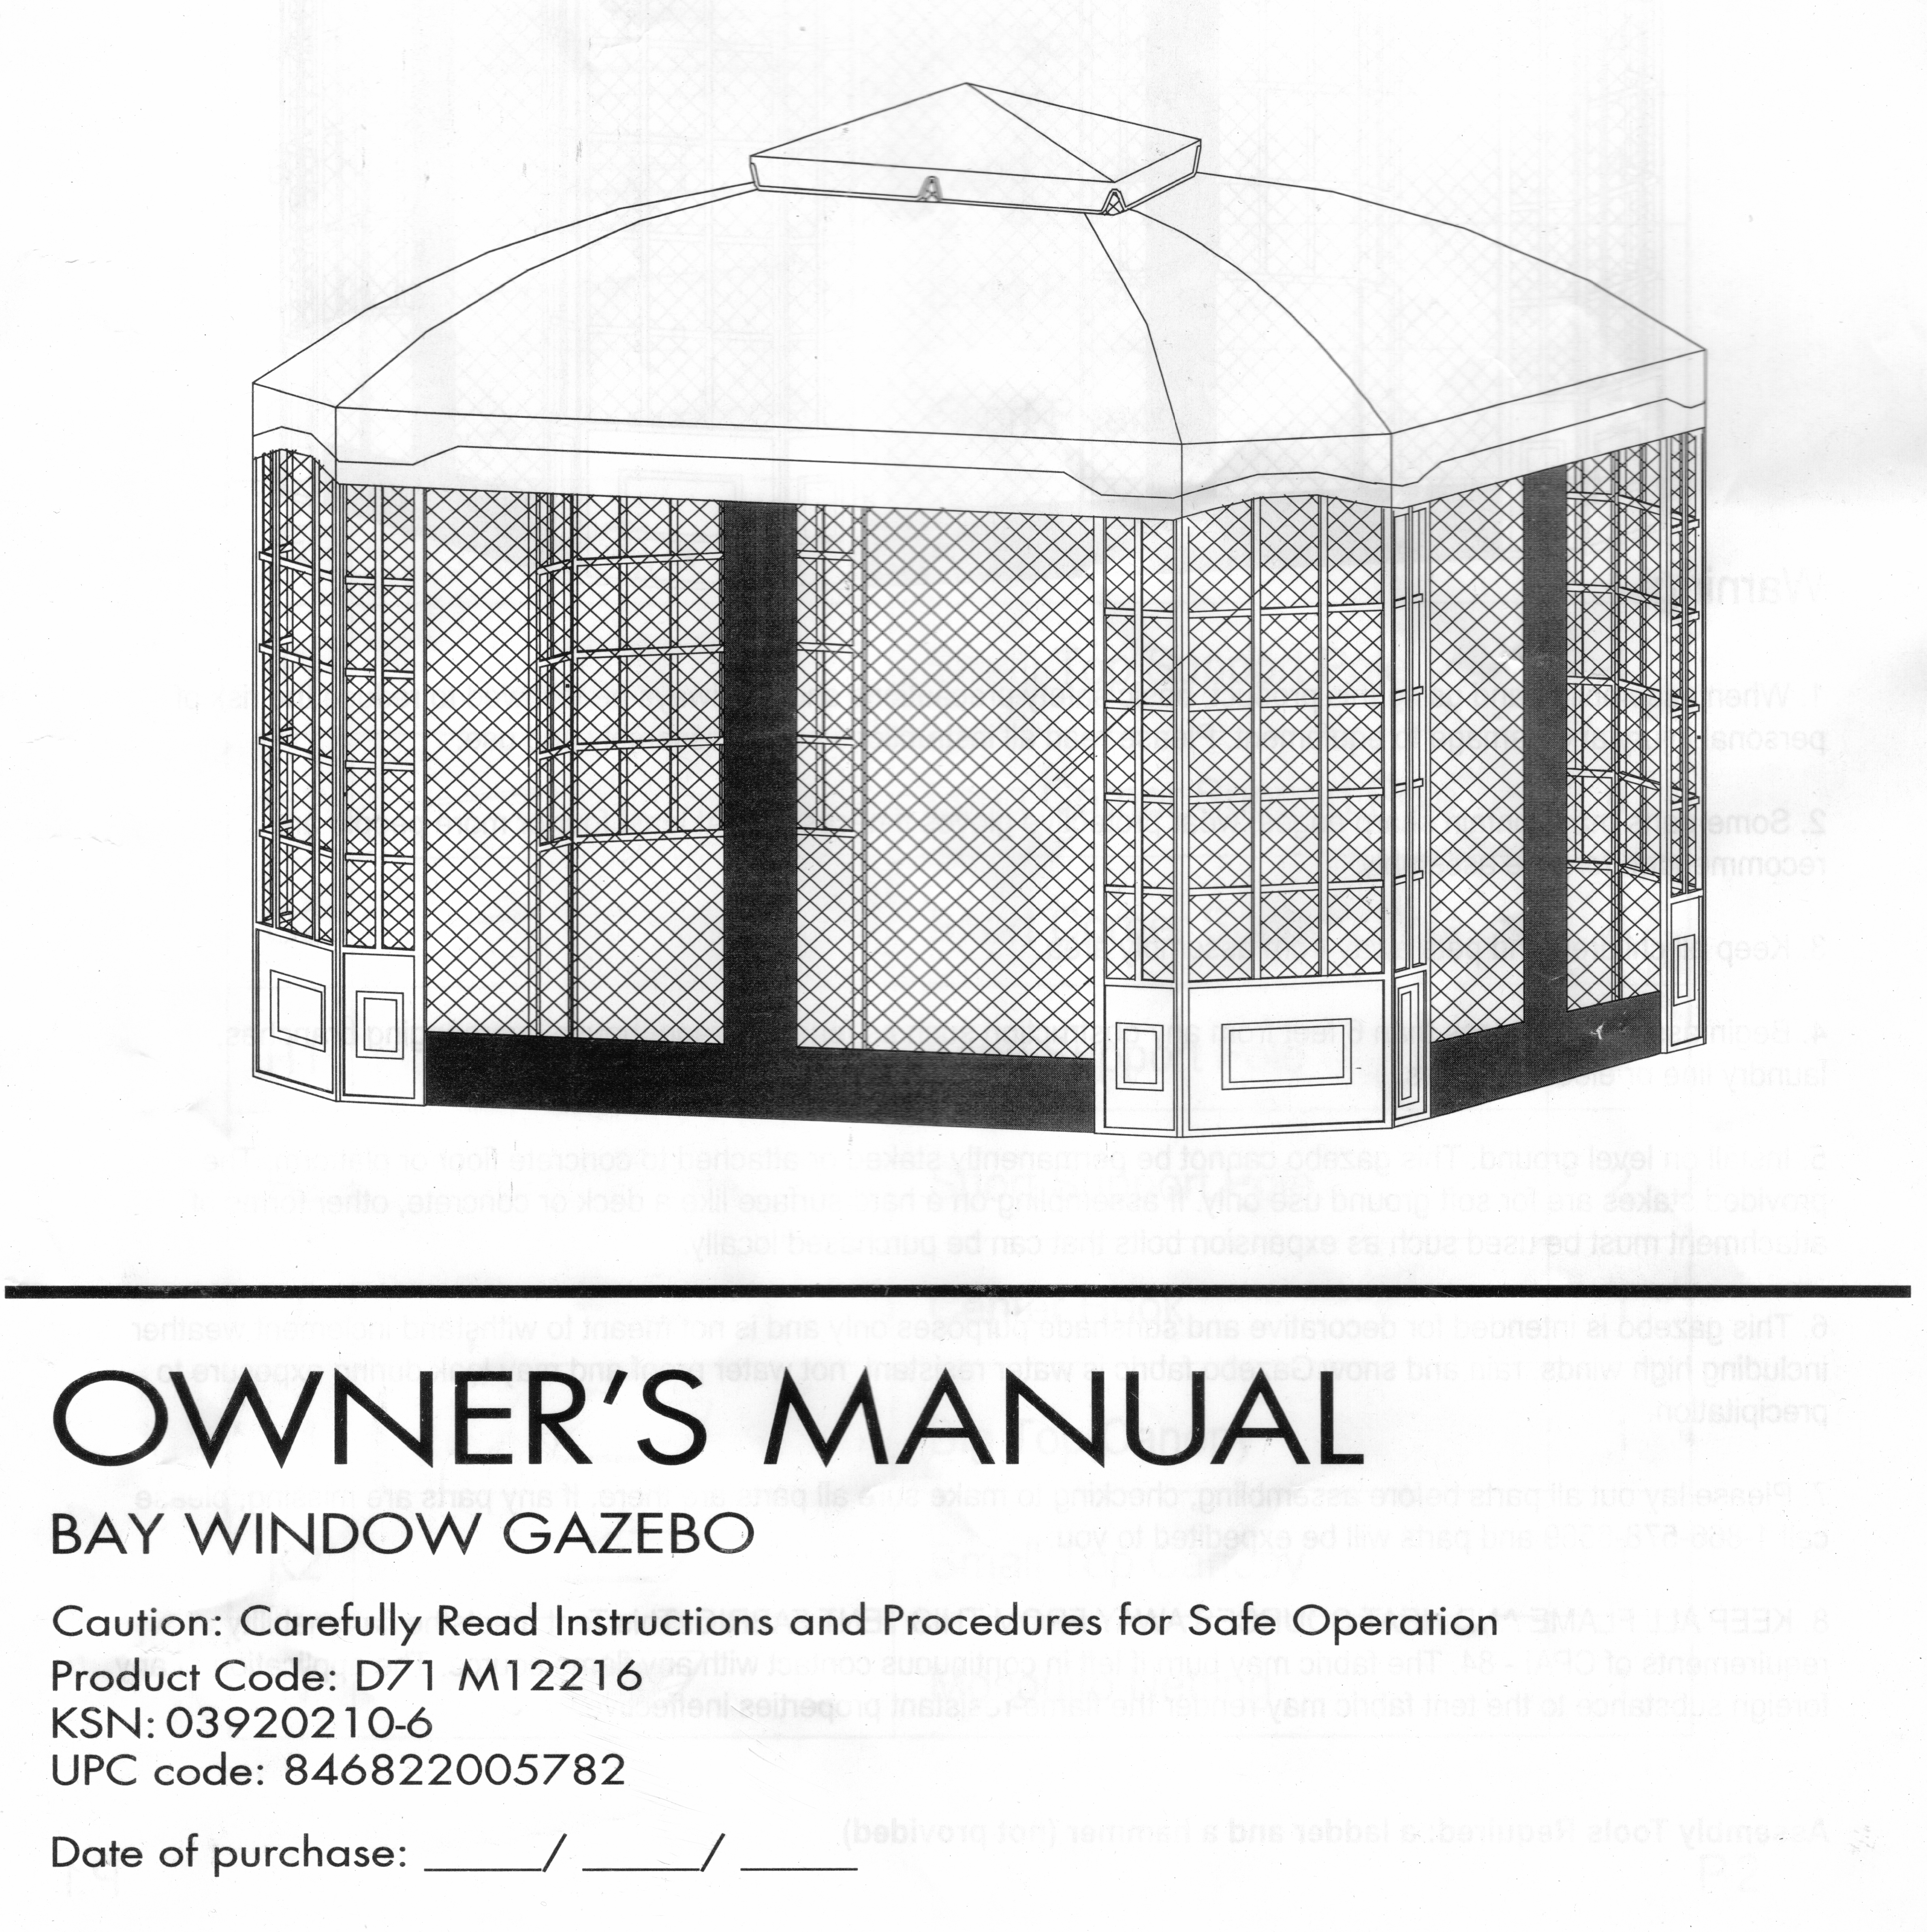
As you might glean from looking at the pictures, there is more to assembling a gazebo than a workmate 125.
One really GREAT difference, though, is that the instructions were in English (as a primary language).
This all started two weeks ago when Judy and I walked into the Sears store in Oakhurst, CA. Not a large place, but it has all of the things that a guy like me needs to test his patience. And it’s staffed by an extremely friendly group of people who we have come to know well and like much over the last couple of years since the house burned down.
On this particular visit, we met Troy for the first time… I was in the market for some sort of electrical sander, and he showed me one on sale. I thought, “It’s on sale. Sold!”
But my shopping spree was just beginning…
On the way to the check out stand, we passed a fully assembled Bay Window Gazebo. This was a very bad thing for several reasons:
In the end, the last point was really the only one that mattered. We promptly ordered one from Troy…
The following Saturday, Judy and I went back in to pick up our new gazebo. While we were there, Judy happened to notice an outdoor furniture set located just adjacent to the check out stand. She had actually been looking online for one all week to go with the new gazebo, and had fallen in love with this specific set. Go figure.
She looked at me. I looked at her. I looked at Troy. Troy looked at me. Troy looked at Judy. Judy looked at Troy. We all looked at the sign stuck to the love seat portion of the grouping…
You know what that sign said? I’ll tell you what it said. It said…
“ON SALE
TODAY ONLY”
Judy smiled at me. I smiled at Judy. I smiled at Troy. Troy smiled at me. Troy smiled at Judy. Judy smiled at Troy.
And the rest is history…
At this point, we had become pretty good friends with Troy, which is both good and bad. Good because it’s always a good thing to make a friend. Bad (for Troy) because this is the point at which I got the idea of “documenting” the assembly of the gazebo, and I thought it would be a great idea to start with Troy briefly going over the process of assembly. Troy agreed and filming commenced…
It’s interesting (to me, anyway) to note that the instructions list only two tools required for assembly – a hammer and a ladder. A small pseudo-wrench-ish looking thingy is provided in the box.
To that list, I personally added two more tools – a second ladder and a socket wrench. The second ladder is only required if you do not have a very tall fellow (8′ tall) to hold up the “roof” during assembly, and the socket wrench is a replacement for the pseudo-wrench-ish looking thingy, which is (in my case) completely useless.
The hammer is for therapeutic use only (in case you elect not to use the second ladder and socket wrench).
And now for the good part of this whole post – I’ve decided to slap together some of the of the hours of video I decided to shoot showing the progress of the assembly. In fact, as you may be able to discern from Judy’s comments during filming, we probably could have knocked this out in about half the time, had I not been so excited about documenting the project.
I will have a few comments after the movie…
After movie comments (clarifications of cerebral flatulations)…
1 – On most good days, I really do know the difference between a hammer and a ladder. I think I was just overly expectant (overenthusiastic?) about the possibility of hitting something out of frustration.
2 – There never was a last step, so anywhere you hear me say the words “last” and “step” together in the same sentence, don’t believe it. In fact, if you hear the words “last”, “done”, “end”, “finish”, “wrap” or any derivative or those (or any other) words, or other indication that something has been completed in any part of this production, you can feel safe in disregarding that sentiment.
3 – When you subtract 8:30 AM from 11:00 AM, you come up with 2 hours and 30 minutes, not 1 hour and 30 minutes.
4 – When you subtract 8:30 AM from 12:15 PM, you come up with 3 hours and 45 minutes, not 3 hours and 15 minutes.
4 – The Bar-b-Cue actually took us 16 hours to complete. This, of course, renders my statement that it took us “between 3 and 4 times as long” to assemble the Weber as it took to build the gazebo a complete and utter falsehood. Probably a subconscious attempt on my part to make myself feel better about my abilities as a “thing assembler”.
Finally (I hope), today we are going to go see Troy again. Judy ordered two ottomans (ottomen?) for the gazebo. Ottomans. Really. I think she wants to start an empire… And besides that…
They are on sale…
One sure way to tell if I have recently been using tools to assemble some doo-dad around the house is to check in at the Church on Saturday afternoon around 3:00. That’s when confessions are heard in our parish, and I usually have to go to confession after building any object that involves more than one part. Moving or otherwise.
God has blessed me with a workbench. And He has blessed me with tools with which to work on various projects around the homestead.
However, He has seen fit to balance the scales by equipping me with the mechanical aptitude of a mango. If there is no possible way to put something together wrong, I will find it.
I have parts left over when I finish looking in the mirror – That’s how bad it is.
Now, don’t get me wrong… In the long run, I am perfectly capable of putting things together. But there are some things that, over the years, I have noticed about my own special process.
While all of these things have been going on for years, it was only yesterday that I realized why thing 1 takes place. It’s because I sometimes actually put things together two, three or four times before I throw in the towel and simply declare that “It is finished!” (Fortunately, nothing has, yet, fallen apart using this exit strategy.)
Yesterday’s project:
Black and Decker Workmate Portable Workbench and Project Table
It’s actually a pretty handy thing to have and, other than the fact that it didn’t look anything like the floor model (mostly because there was ‘some assembly required’) when I ripped open the box, it is probably the best $30.99 plus tax I have ever voluntarily relinquished to True Value Hardware Stores.
I was so excited when I found it. I was actually looking to replace the folding plastic saw horses that somebody made off with after the house burned down. This was so much better, and so much less expensive!
Yehaw!
Sadly, my mood changed when I saw several plastic bags float to the garage floor upon my opening the box. You see, plastic bags are nature’s way of hiding nuts, bolts, screws and whatever pathetic screwdriver/wrench/hammer/drill/shovel combination tool that the manufacturer inserts into the box with the picture of the fully assembled and operational product on the outside.
There was, of course, most of an instruction manual.


This project actually went (for me) pretty smoothly, once I figured out that the actual artwork (pictures) were mostly in English. It only took me 2 hours and 27 minutes from start to finish. And I only had to disassemble and reassemble twice during the entire process. Somehow, I had managed to reverse parts X and Y when attaching them to parts R and L. But it wasn’t entirely my fault – I did that before I realized that those letters in French are actually pretty much the same as they are in English…
This is an accurate representation of how I usually progress when I inflict “construction” upon myself… Except that Homer is much faster than I…


